Blog

First, let me say "Thanks for looking". Building a blog is something I have wanted to do for a long time and finally I have the chance. I will be writing here from time to time and I hope you enjoy following along.

2015 Daytona Rolex 24


Shhh! I am about to tell you a secret…  But, first some background.  In 1979, I my honeymoon started with a visit to the Daytona 24. This was my first time back since then, and it was a return in style. That brings me to the secret – I attended as a guest of Porsche Motorsports and spent my time in the VIP compound. What a way to watch a race! On arrival in the designated parking area, we were greeted by several waiting golf carts. The golf carts were there to drive us from the parking area to the compound. And what a luxurious compound it was – a blazing white tent with “Porsche” in red letters across the top, white tables and chairs, sofas, and plenty of room to spread out. After being greeted we started to look things over. There was clearly going to be ample food and drink. There were many TVs, a countdown clock waiting for the race to start, spotlights highlighting sayings by Ferdinand Porsche for inspiration, and more. Multiple meals were going to be provided during the day and the bars (two, one indoors and one inside) were there for drinks and beverages. Out back was a silver Porsche 918 Hybrid to look over. There was also a pit roof seating area for our use.

Porsche Motorsports VIP Compound

Porsche Motorsports VIP Compound

The staff was made up mostly of Porsche North America staff but there was also a full catering and bar staff. Everyone, and everything, was ready for 24 hours of racing.  Three of Porsche North America’s drivers (Nick Tandy, Patrick Pilet, and Marc Lieb) came to speak with us. I learned that while Le Mans has roughly 7 hours of darkness, Daytona would have about 13 hours of darkness. Daytona is clearly a challenge. Members of PCA came by to visit, but they mainly stayed in the PCA Porsche corral on the far side of the track. (The new PCA 911 GTS Club car was on display there.)

Since this was only Friday afternoon, we started to settle in. We checked radios and walked around. Our passes gave us almost complete access to everything but the hot pits. We walked through the garage area and watched the teams making last minute adjustments. I saw a few friends and everyone was in a great mood and ready for a great race.

We marveled at the many Porsches on display as past winners of the race in the “Spectator Fan Zone”. I did not see the Hurly Haywood/Danny Ongias/Ted Field Porsche 935 car that I watched win in 1979, but there were many great Porsches there -- 962s, 914’s, 935s, 911s and more. The display showcased Porsche’s past dominance of this event.

As we walked around, I made a mental note of good photography locations for the race. I noticed almost immediately that on turn 2, I would need a step stool to photograph over the fence.

The first race up was the Continental Tire SportsCar Challenge series race – the BMW Performance 200 – on Friday afternoon. Both classes were won by Porsches. Fifty-one cars raced for two and a half hours over the 3.56 mile Daytona circuit. Winners of the Grand Sport class and the overall winners of the race  were brothers Matt and Hugh Plumb in the No. 13 Rum Bum Racing Porsche 911, followed by Andrew Davis and Robin Liddell in the No. 6 Stevenson Motorsports Chevrolet Camaro Z/28.R.  Stevenson teammates Lawson Ashenbach and Matt Bell were third in their No. 9 Camaro Z/28.R.

Spencer Pumpelly (not a stranger to readers of these pages) and Luis Rodriguez, Jr. took the victory the Street Tuner Class in their No. 17 RS1 Porsche Cayman. In second was Eric Foss and pole sitter Justin Piscitell in the No. 56 Murillo Racing Porsche Cayman, followed by David Murry and Ted Giovanis in the No. 64 Team TGM BMW 328i.

We went to dinner at Winghouse down the street from the track with friends. After a good meal, we retreated to our hotel to get some sleep (in Palm City, FL, 40 minutes away). We were back at the track by 8 in the morning. Just in time for a great breakfast in the Porsche compound. After the heavy rain stopped, we walked through the garages and during the pre-race activities we walked out on the banking. There were many people there; all were amazed at how steep the banking was at the start/finish line. I am sure we all thought – if the banking is this steep here, how steep it is in the turns!

It was 2:30pm, and time for race start, before we knew it. The countdown clock started in the compound. And the race was on. The Daytona prototypes thundered into Turn 1. But I was really here to watch the Porsche Motorsport team cars. And they did not disappoint in the early goings of the race. They challenged the Corvettes and Ferraris for the lead and stayed in contention. This was supposed to be an endurance race, but the Corvettes, Ferraris, Porsches and BMWs in particular ran it as a sprint. No quarter was given and none expected. Every car took advantage wherever it could. I took pictures over the fence as we walked around the track (by one count we walked 8.5 miles).

Before we knew it, it was night. I don’t remember so many lights in 1979. I guess the lighting is an improvement. The track is now lit most of the way around. There were pit stops and crashes in the early evening. We had steaks for dinner. We drank wine (compliments of the open bar).  We had a snack a few hours later. Around 10 pm we started to leave the compound to walk more. Then we learned that the compound would close at 10. We panicked. Boy, was I glad I had insisted on our having rooms for Saturday night; we had planned on staying in the compound overnight. We started the trek to our hotel (40 minutes away) at 11 pm.
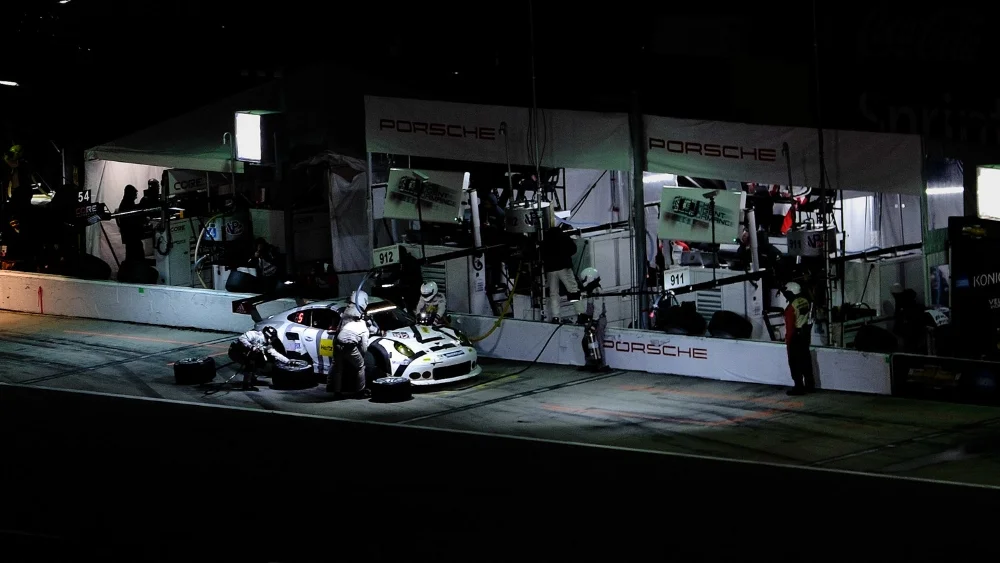
Night Pitstops

Night Pitstops

We were back at the track at 4 am. This time we went high up in the immense grandstands for a night view of the goings on. (There were people sleeping on the seats despite the 40 degree temperatures.) We then made our way back around the circuit in anticipation of photographing the sunrise behind the cars. Sunrise did not disappoint either. At 8 am we went to the Porsche compound for breakfast.  Then, we walked some more. We were tired by this point and spent much of the time after lunch in the compound watching on TV. The cars and drivers were tired as well. With the coming of light, many cars had mechanical problems. This seemed a time for failure. In the compound, we learned the Porsche Motorsport cars had a shunt overnight (with each other). We learned that the lead Ferrari was out of the race. It became a race in the GT Le Mans class between the two Corvettes and a BMW. The prototypes were charging around in their own race of drama. And one of the GT America Porsches had hit an opossum. (The pit crew found it in the trunk hours later, named it “Ballast”, and gave it a twitter handle.) The end was near.

In the prototype class, after 24 hours, 740 laps and 2,634.4 miles, the 2015 Rolex 24 at Daytona came down to a seven minute, 30-second sprint that saw the No. 02 Chip Ganassi with Felix Sabates Ford EcoBoost-powered Riley DP squeeze out a 1.333-second victory over the defending Rolex 24 champion No. 5 Action Express Chevrolet Corvette DP. The Wayne Taylor Racing Corvette DP had to settle for third.

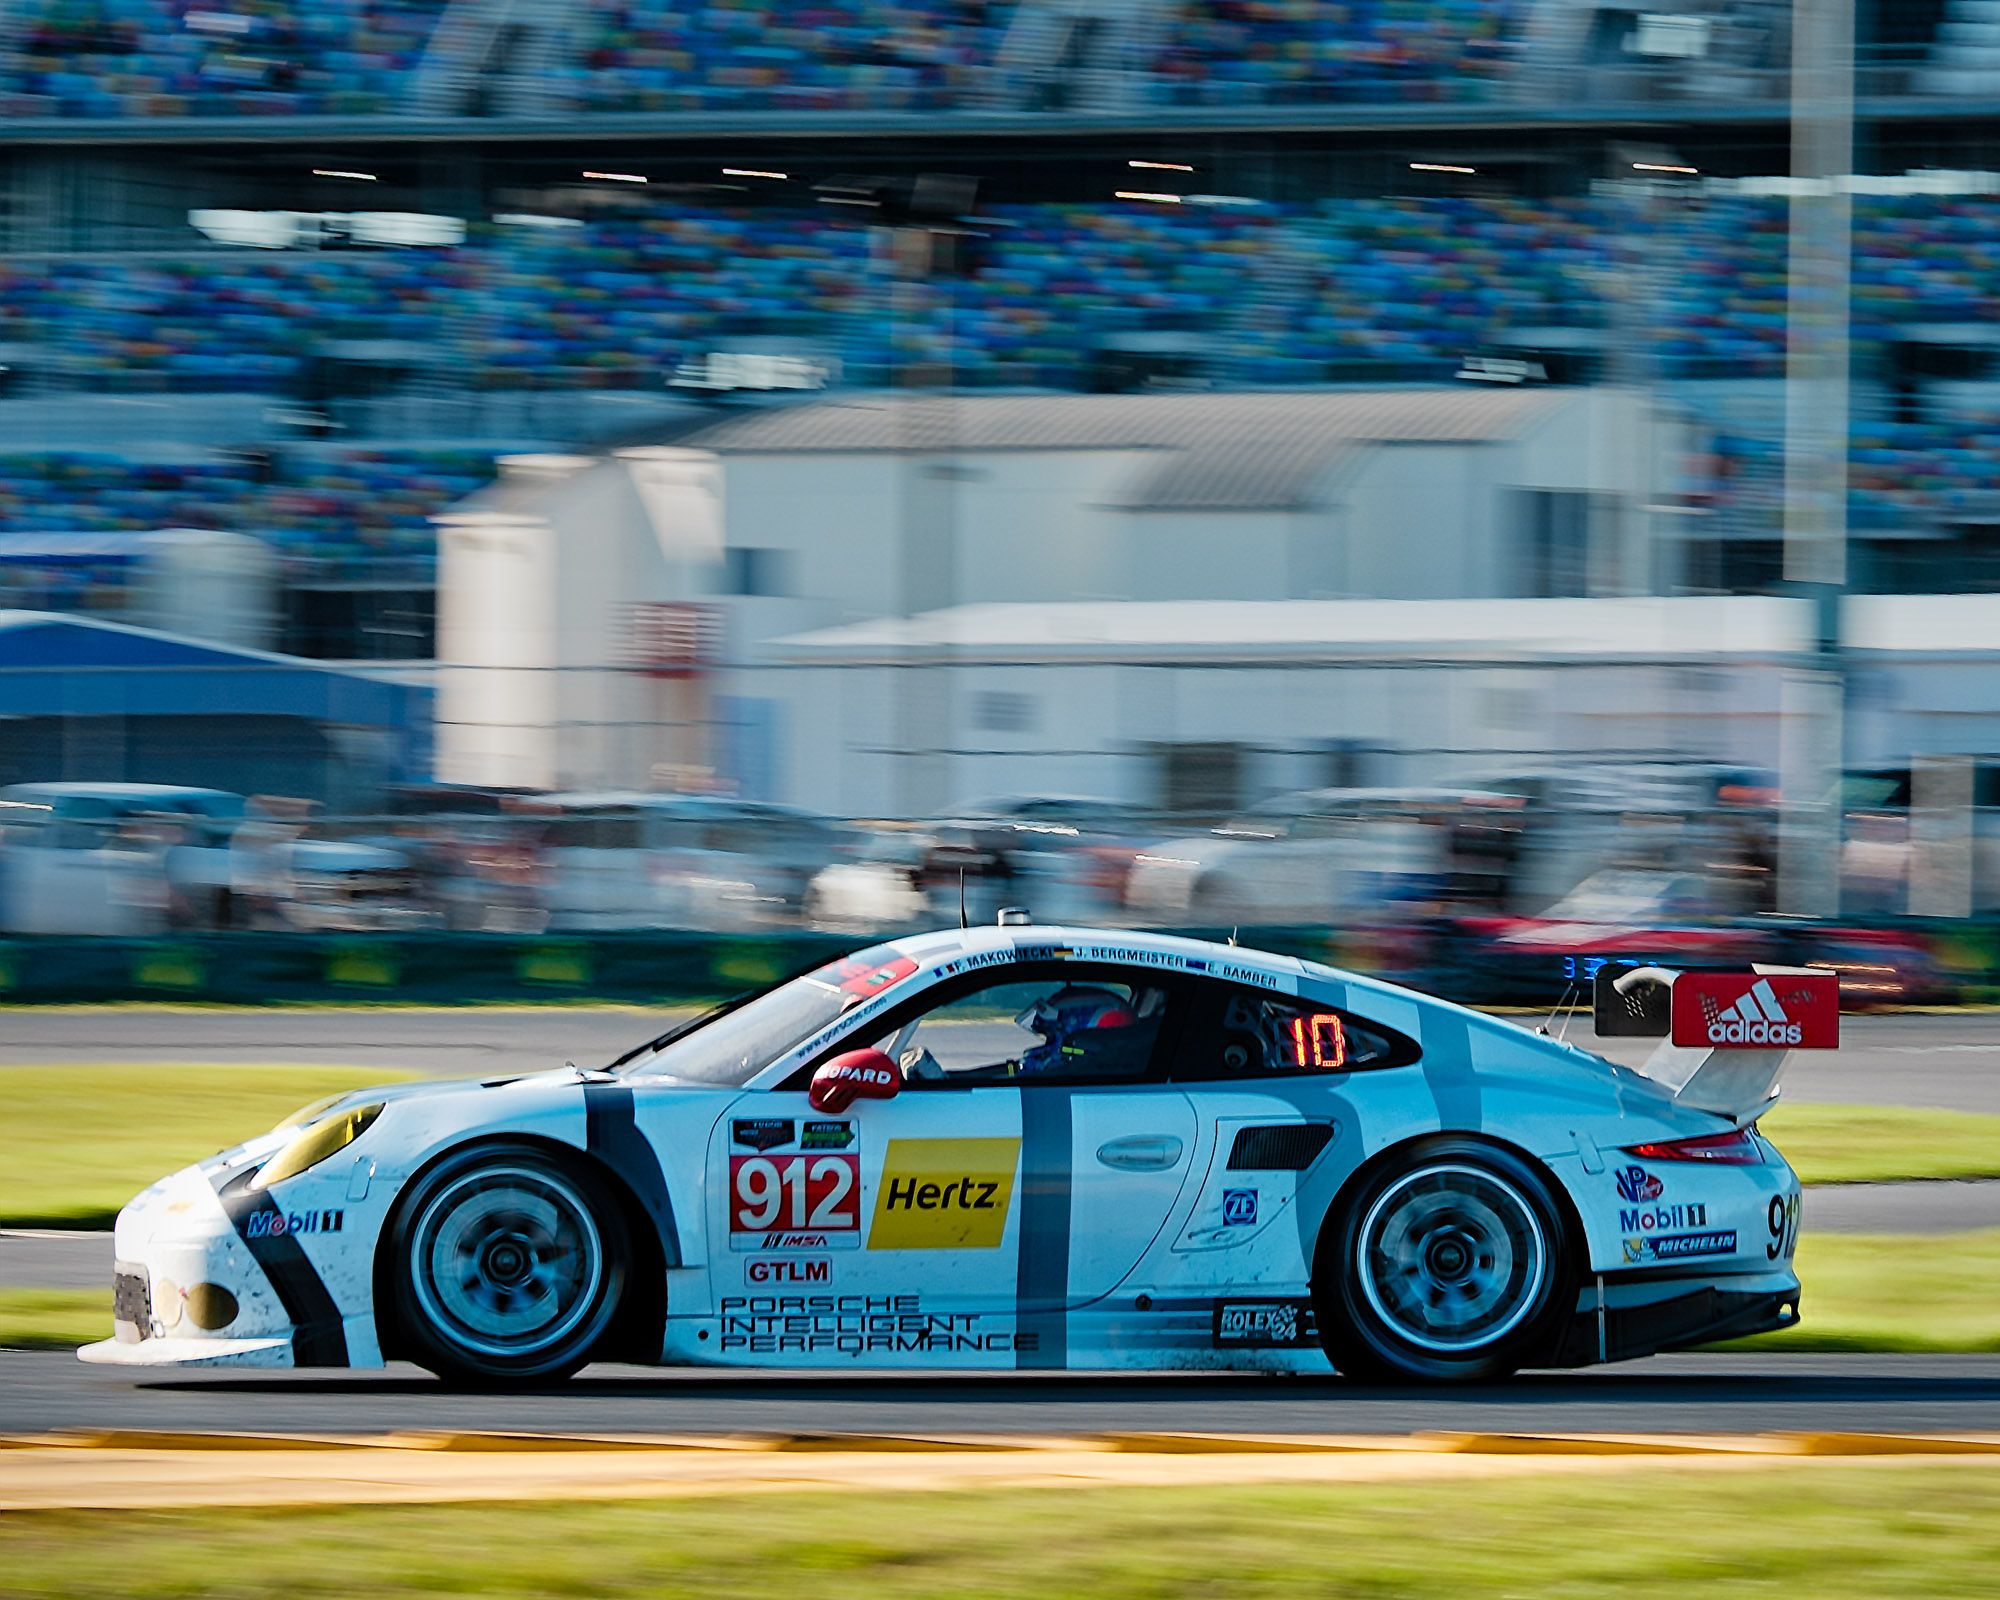
In the GT Le Mans class it was close as well. The No. 3 Chevrolet Corvette C7.R  (driven by Antonio Garcia, Jan Magnussen and Ryan Briscoe) took the class win and a surprising fifth overall, just 0.478 seconds ahead of the No. 25 BMW Team RLL BMW Z4 GTE. This was Corvette's first Rolex 24 win since 2001. The Porsche Motorsport team cars 911 (driven by Tandy/Pilet/Lieb/Christensen) finished 5th in class, and car 912 (driven by Bergmeister/Bamber/Makowiecki/Christensen) finished 7th in class. While it had not been a good day for the Porsche factory team, it showed the car has the speed. Wins will come; the season is just beginning.

In GT Daytona, the No. 93 Dodge SRT Viper finished first in class, 7.6 seconds ahead of the No. 22 Alex Job Racing/WeatherTech Porsche 911 GT America. Oh, and Ballast finished 11th in class.

I am already making plans to go back next year. You’ll see me in the Porsche Motorsports VIP area.

All images are taken with a Fuji XT-1 Camera and Fuji lenses (mainly a 50-140 f2.8)

How to Photograph Cars

For a while now, I have been asked to write an article about “Photographing Cars”. Well, here it is.

Visualization

The first thing to keep on mind when photographing cars is to “Take it Easy – The car won’t move (or if on a racetrack, it’ll come around again)”. Many photographers rush their shots and a rushed shot is often not a good shot. A great shot begins with some “pre-visualization”. Think about what you want to shoot and then think “How can I make it better”. Only after pre-visualization do you pick up your camera.

When pre-visualizing, remember that the rules of composition have to be considered. The first rule to consider is the “Rule of Thirds” – put the subject on an intersection of the third lines. Be sure to leave some empty space in the shot. Space around the main subject (which should be on one of the third lines) conveys the ambiance of the scene and, if working for a magazine, provides space for the editor to put in some words or at least gives them some framing space.  Empty space is especially valuable in the foreground or above the car. The car itself should be aligned on the top or bottom third line, or better yet on one of the intersection points of these third lines.

Another rule of composition -- use “Leading Lines”. Use the lines of the car as leading lines to take the viewer’s eye on a journey through the photograph.

Lime Rock Park

Lime Rock Park

Use the “Photographers Circle” – take a look around. Look for the shot. Explore the possibilities. Many photographers are happy to shoot from the same spot as others. No, make your photograph unique. Look for the shot that others don’t have. This may mean don’t stay with the crowd. Will a different angle help? Always think -- How can my shot be something different? You don’t want a snapshot. It is art.

Some photographers “mine” photographers work that they like for ideas. A lot of car shots look similar the best ones are the ones out of the ordinary. Is there a photographer you like that can give you ideas?

But even in this pre-visualization step -- Don’t miss the decisive moment. Even with stationary cars these moments occur. Watch for the owner - Anything unusual about his clothes or face? If you are in a public place are other people looking at the car while you are trying to shoot it? Is there anything interesting about them? Do you want to incorporate people in the shot? Learn to anticipate and make it part of your pre-visualization.

Once these rules are considered, decide how you want the car portrayed. Figure out what angles work best for the particular car you are shooting. Take a head on shot, a ¾ shot from the front and rear, and then take a side and rear shot.  As you start to hone in on the car, decide what is the most interesting aspect of the car you are shooting, the most interesting detail, etc. Shoot these details. Every car has something that makes it unique. If you can find and photograph a signature element of the car -- great.  Perhaps, the flying lady on a Rolls-Royce, the side pipes on a Cobra, or the “hips” of a Porsche GT3 RS.

Porsche GT3 RS

Porsche GT3 RS

Shutter Speed and Aperture

Now that your pre-visualization step is over, let’s get ready to take a photograph. Never forget that it is still photography and the basics still matter. Keep your camera’s ISO (once called film speed; now it is a measure of sensitivity to light) at the lowest. Unless you are photographing a moving car you are not dealing with motion and there is no need for a high shutter speed. Better yet, shoot from a tripod if you have the time and space. If the car is moving, use the lowest ISO you can use to get the f-stop/aperture combination you want

Speaking of shutter speed and f-stop/aperture, shoot in Manual or Aperture-priority mode whenever you can. This gives you better control over the depth of field and allows you to shoot for maximum sharpness. The old press photographer’s slogan is “f8 and Be There”. It still holds true today and f8 is usually a good place to set your f-stop/aperture to start the shoot. (Unless, your pre-visualization dictates that you use "bokeh" to get the shot you want.)

Consider shutter speed, if you want to capture:

  • Motion – shoot a little slower shutter speed and use a fill flash to exaggerate motion (no fill flash for auto races!)
  • Depth of Field – Maybe a higher shutter speed and a more open shutter will de-emphasize distractions in the background.
  • The general rule of 1 over the focal length of your lens still works. Example , when using a 200 mm lens try not to shoot slower than 1/200. But, if you have vibration stabilization you can shoot 1 – 2 stops lower. In other words, maybe at 1/80 sec (But if using a tripod, turn vibration stabilization “off”.)·  

Light

Consider the light. Light is an essential element of photography.  As a general rule natural lighting is best. Most photographers want to shoot on a bright day, but consider these types of lighting as well:

  • Overcast day --The soft-and-even light of an overcast day is ideal for recording bright colors and fine details – just be sure to minimize the amount of overpowering white sky in your picture.
  • In midday sunlight, shooting success hinges on flexibility.  For instance, in the morning, a subject may be engulfed in shadows, but in the afternoon, the same vehicle may be shining in sunlight.
  • Scrims (large diffusion panels)  can be useful to cut down on overpowering overhead light, but watch their reflection on the car. A large white area can be distracting. Also, the scrim has to be large enough to make a difference (a scrim with dimensions something like a 6 ft. x 6 ft. should work).

Most photographers do not consider reflectors. But they are an essential tool for photographing static cars. They can enhance the natural light shot by highlighting elements of the car.  But careful positioning is essential because you will want to hide the reflection of the reflector! Try hiding the reflection in a wheel well or on a tire (something non-reflective).

Car Show

Car Show

Another often overlooked tool is off camera lighting (flashes and strobes). They allow the photographer to use the exposure you desired. Proper use of fill flash can makes a car stand out from the background.

Interior shot at car show

Interior shot at car show

Here’s “quick and dirty method” way to deploy your fill flash. First, select an exposure for the sky that is not above your cameras sync speed (i.e., not above 1/125 or 1/250 sec.; but read your camera manual to know for sure). Second, set the flash or strobe on full power if there is strong sunlight. (Don’t forget to use a diffuser if using a wide angle lens to spread the light from the flash or strobe.)  Finally, hold the flash or strobe to one side of the camera and use a sync cord to give you more distance from the camera.  If the flash or strobe is too strong – change the aperture, dial down the flash, or take a step backwards (use and apply the inverse square law). If the car has reflective license plates take one step to one side or the other to avoid the glare.

Lens Choice

Another part of shooting is to choose the lens needed to get the photography you visualized and prepared for.   Here are some quick rules:

Wide Angle lens

Wide Angle lens

Wide angle lens exaggerate a car’s features. What kind of look at you trying to achieve? Wide angle lens often can yield a “tough look”. Use this lens type to get close to the vehicle and exaggerate the perspective.  How wide does the lens need to be? A 28-mm lens on a full frame camera is often enough unless there is a desire for extreme exaggeration.  A normal to longer focal length will do the opposite (yield a flatter, more elegant look to the vehicle).

"Normal" lens

"Normal" lens

400 mm f2.8 lens

400 mm f2.8 lens

Other Elements of the Scene

At most car shows there are people everywhere. Here is where patience comes in -- Wait for them to move. In most cases people distract from the main subject of the photograph. If they don’t move, look for another scene.  Most showgoers gather near the "main stage" area. But great picture subjects exist on the fringes. Be sure to clear away litter in the scene or put elements into the scene that will enhance the photograph (but if it is not your car, don’t touch the car without the owner’s permission). Watch out for poles, particularly telephone poles, fire hydrants, and electrical lines, and shoot around them. Even the sky can be a distraction and it can cause color shifts if the sun is too bright.

Try to find an attractive place to photograph the car. With an expensive car, try shooting at a country estate. With a race car, a pit shot may work nicely. At a car show, you may not have many options, but if the adjacent car takes away from the shot be creative.

Try not to take eye-level shots. Shots taken from eye level are often boring. Car shots look their best when the view is from the same height as the driver or lower. To get the shot you may have to kneel, lay down, or stand on something. When laying down and using a telephoto lens, the car will look more aggressive and purposeful.

Details

Don’t forget the details. Details often make for creative shots that catch the eye of the viewer. Some ideas:

  • Get closer (exclude other details)
  • Crop the shot really tightly (either in camera or in post processing
  • Try shooting a tail light, an emblem, a curve of the bodywork, a quarter of the front grill with a headlight, etc.
  • Learn to tell a story with one shot
  • Having worked with the car, you should know its main design features. Have a good look around, working handheld, to try and exploit any details such as bodywork shapes and lines, manufacturers badges, wheel structures and grills.
  • It’s also important to remember that there are many interesting interior details worth shooting. The manufacturer’s logo will appear many times within the car’s interior, and there will hopefully be a few nice design features that may be worth considering. Make sure there is enough light available for the shoot, especially if you’ve been shooting on location in the evening light. You may want to wait until you can effectively light the interior, as it would be a shame to miss out on the details especially if you have a chance to enhance them with studio lights.


Wheel closeup - Porsche Carrera GT

Wheel closeup - Porsche Carrera GT


Good Shooting!

Shooting the Fuji X-T1

I finally had a chance to shoot my Fuji XT-1 for an extended period – it was Cherry Blossom time. I like the size and love seeing the controls on top. It reminds me of film days in a really great way. The buttons are usable, and unlike its sister camera, the X-Pro1 with the rangefinder look, the exposure adjustment knob is not easily moved to an unwanted setting. The tilt LCD screen on the rear is useful and clear. There is even an ISO knob on top of the camera. Now, that’s retro.

But the main feature of the camera is how it feels in the hands and the pictures it takes. The X-T1 is styled as a mini, retro SLR.  And it works, it really does.  I customarily shoot large cameras – like the Nikon D4 and D4s. But the X-T1 is small and compact and performance is solid. The camera, like the Nikons, is weather sealed. Its performance is not in the territory of the Nikon D4 and D4s, but good. The sensor is great with skin tones and EVF screen is bright and clear. I don’t hesitate to send shots taken with the camera to clients.

Sunrise at the Tidal Basin, Washington, DC

Sunrise at the Tidal Basin, Washington, DC

This is a mirrorless camera. No mirror or complex mechanisms to slow the camera down. But the viewfinder has to show you what you are taking a picture of. EVFs do have some compelling advantages. As mentioned, losing the mirror and pentaprism dramatically reduce size and weight.  An EVF also allows real-time histograms and image information to be displayed over the subject itself.  Lastly, in low light an EVF can often be brighter than a traditional OVF.  All of these can be real advantages.

The EVF on the X-T1 is about an 8 on a 0-10 scale. While most EVFs to date have not been good, this may be the best so far. It certainly is superior to the EVF in the X-Pro1. For one, the EVF in the X-T1 is HUGE.  It looks bigger and brighter than a standard 35mm optical viewfinder. In addition, the brightness, resolution and refresh rate are all good enough that the X-T1 is responsive and pleasant to use in almost all situations.   I admit to having problems when shooting manual exposure in the studio until I learned to turn OFF the exposure preview in the EVF when shooting in that mode.  If I didn’t, the exposure preview seen in the EVF was too dark to see what was being shot.  After the change, shooting the camera in the studio is a pleasure.

The autofocus is quick and accurate. It uses phase detection instead of the usual contrast-detection focusing systems most mirrorless cameras come with. Fuji claims “fastest in class” autofocus. I can’t say whether that is an accurate statement. I will say that the camera’s autofocus performs well.

The camera also has a very useful face detection system. And, it works. It finds the face and typically the eyes too. The X-T1 gets it right a high percentage of the time.

The Fuji lenses. Ahhhh.  The lens selection has filled out nicely, and now rivals the offerings of any other system.  The 56mm f1.2R lens is outstanding for portraits.  It offers incredible bokeh and excellent sharpness wide open.  The 35mm f1.4 XF R is less so, but still very usable.  For wide-angle work I love my Zeiss 12mm Tuoit f2.8 lens. Between this lens and the 56mm, I am in heaven. I have the Fujifilm XF 55-200mm f/3.5-4.8 R LM OIS zoom lens, but I usually use the primes for most work with this camera. The zoom, however, makes the camera viable for sports use. (I haven’t used it to for any motor sports events yet, but I will soon. And, I will blog on how things went.)

The X-Trans may be the best APS-C sensor in the market. Other reviewers say it is rivaled only by Pentax’s AA-filter free K3 and K5-DII.  I have never shot with the Pentax, but I can say the image quality does not disappoint. In the last few weeks, Lightroom has finally been updated to support the Fuji film-simulation modes. The film-simulation modes are great. I now shoot RAW and jpes at the same time. The jpegs allow me to get good results out of the camera without making extensive settings changes. In other words, I don’t have to dial in the camera to get high quality results out of my jpegs. Using the jpegs (which require minimal processing) ensures that I can deliver photos to clients quicker. I usually shoot “Velvia” for the jpegs.

The in-camera white balance is accurate. I seldom have to spend much time in LIghtroom correcting the white balance. Although the camera tether directly to an iOS device via WiFi, I haven’t used that feature yet. I also haven’t used the associated camera control system (via WiFi).

The X-T1 is not perfect though.  I still dislike the four-way controller. It is too small, and why does the macro mode need to be activated by a small button directly above the controller? This is confusing at best. (It is the same on the X-Pro1.) Unlike the X-Pro1, there is no threaded cable release (which I prefer) and an electronic release has to be used instead.

Washington Monument at Sunrise

Washington Monument at Sunrise

Too many buttons are needed to use the user-selected AF. A second button must be pressed to activate focus-point selection before the four-way is used to move between points.  Not good design.  The user should be able to configure the camera so that the four-way controller directly operates focus-point selection.  Fuji did keep its excellent "Q" Menu system. The "Q" button allows quick access to most key controls not directly attached to a hardware dial.

I have used the camera for studio work and landscapes. I have been happy with the shots taken in both situations.  The “X” series is maturing nicely with the addition of the X-T1. Being an X-Pro1 user, I can definitely see the improvements. This is Fuji’s best “X” body yet, and their new lenses are a pleasure to use. I use primes more and enjoy it! With the Nikons I find I typically reach for a fast zoom. The Fuji brings back memories of film days and the way we used primes. I like the return to the past, especially when the images are pleasant.  I like the small size and the fact that I am not always drawing attention to myself (the way I do with the Nikons) when shooting street scenes.  This camera is a real hit for Fuji, and deservedly so.


New Camera(s). Wahooo!

Not one but two new cameras. Let’s go in order.

Since I have the Fuji X-Pro1, it was a natural that I also buy a Fuji X-T1; I have Fuji and Zeiss lens that will fit both. The X-T1 is a stunner. I love all the buttons on top. I like the articulated screen on the back. I really like the Fuji skin tones. The camera is also small and compact. The X-Pro1 is actually larger. I did not expect that. But the X-Pro1 and the X-T1 complement each other. I will use the X-Pro1 as my “street shooter” camera and the X-T1 for the rest.

The menu system in the X-T1 is similar to the X-Pro1 so setting up the X-T1 was easy. I checked the settings and fired off a few shots the night I got it. High ISO was not bad.

The first real test of the X-T1 was in the studio. (As a matter of fact, I used the other camera the first time then too.) There were no surprises during the shoot. The camera performed nicely. I did have trouble setting up the WiFi though. The iPad I wanted to see the pictures on wanted to switch to the office WiFi instead of staying on the camera WiFi. So this is something I have to look into. I used the 56mm f1.2 lens and it was great. This is the 85mm equivalent that I need for the Fuji system! This lens and my Zeiss 12mm f2.8 are my favorite lens for the Fuji system. I used the Zeiss extensively for my trip to the Porsche museum (see the other blog entry) and I think I will use the 56mm at least as much.

The other camera – a Nikon D4s. This camera replaced my Nikon D800. I now have a D4 and a D4s for my event, motorsports, and car photography. The differences between the D4 and D4s are subtle but the cameras are different. The feel in the hands is very familiar.

You will notice in the above that I haven’t said much about picture quality of the X-T1 and the D4s. I didn’t because Lightroom and Photoshop don’t support them yet! There is a release candidate available but that is in Beta. I think I will wait until Photoshop is updated. I’ll post more when I get Lightroom/Photoshop up and running.

Fuji XPro-1 Meets Europe - December 2013

After shooting for many, many years solely with Nikon equipment (currently a D800 and a D4, but soon with a D4), I decided to branch out. I am testing a Fuji Xpro-1. In December 2013 I left my beloved Nikon gear behind to see whether I could manage with the Fuji as my sole camera body and 3 lenses (Zeiss 12mm f2.8, Fujifilm 35mm f1.4, and Fujifilm 55-200 f3.5 to 4.8 OIS) on a trip to Europe. I figured it would at least give me a lighter camera bag to carry. Besides, the focus of the trip was to spend time with my daughter; it was not meant be a photo expedition. (She had a Nikon 3100 and several lenses with her anyway so a Nikon would be close.)

Fuji Xpro-1

Fuji Xpro-1

I arrived in Amsterdam’s Schiphol Airport and went to meet my daughter. She wasn’t where I expected her to be. Now I understood the virtues of a light camera bag. But I still didn’t know how the Fuji would perform. I had done some shooting with it before I left home but nothing major. I searched for her and finally we found each other.

After listening to a pitch to take a Porsche at the car rental agency, we left on the Volvo we originally reserved. We set off for Maastricht, Holland. We arrived at a beautiful church that had been converted into a hotel. It was beautiful, especially with all the Christmas decorations. The rooms were very modern and unique. We went to the local Christmas market and I shot some street scenes. The camera, even with the large 12mm Zeiss lens mounted, was unobtrusive. No one noticed me taking pictures. Certainly, if I had pulled out the D4 they would have taken notice. Score a point for the Fuji over the D4.

The next morning we pulled out for the National War Museum in Luxembourg.  It was raining but the temperature was around 45 degrees. We travelled through Holland and Belgium. On the way we drove through Bastogne. Of course, we stopped at the 101st Airborne Museum there. After a short drive around town, we continued on our journey. It helped that the Volvo had a good GPS system. The National War Museum was a short drive away and contained numerous dioramas and displays. After a pleasant visit, we asked how to get to the touring trails of the Battle of the Bulge battlefield. After seeing all the wonderful displays we were ready to see the actual battlefield.

We set off, with the continuing rain, to find the touring trails. Before leaving home, I found an annotated map explaining what went on at each stop on the trail and I found out that the German trail was about 18 km long and the American trail 5 km long. We searched and searched and finally found a way into the American trail. But there was a sign we did not recognize. We had no Internet connection and no idea what it meant. We pressed on and entered the trail. It was narrow but passable. We saw two people walking and they told us the trail was muddy ahead and that we did not have the right tires on the car. We left the trail and drove around the area in the rain before leaving for Heidelberg, our next stop. It wasn’t until we got to Stuttgart that we learned that the sign meant no vehicular traffic. It was a walking trail.

The drive to Heidelberg was longer than I expected. But driving the autobahn was a pleasure. Heidelberg is a nice city on a beautiful river. There were not many people around because I was there on Christmas Day and the day after. I did not take many pictures here or in Belgium/Luxembourg due to the rain. The Fuji is not waterproof like the D4. Score a point for the D4. 

Porsche Museum, Stuttgart, Germany

Porsche Museum, Stuttgart, Germany

In Stuttgart, I began shooting in earnest. My first stop was the Porsche museum. Beautiful facility. It was indoors so I could shoot with abandon. I quickly noticed how nice the colors were with the Fuji. The sensor is very nice. Color tones are accurate and clean. I shot in both RAR (Fuji’s version of RAW) and JPGs. The JPGs allowed me to see what the shot would look like if printed on Fuji’s Velvia paper. I did not even notice that I was shooting with an APC size sensor. I liked that the camera was mirror less and noticed it mainly by how quiet the camera was when the shutter was fired. I can certainly see why the future is with mirror less cameras. I really want to see what the Nikon mirror less camera equivalent to the D4 is going to be like.

Shooting in the Mercedes museum was similar. The Fuji handled the different lighting levels with no issues. The sensor did not show much grain at high ISOs. I had been spoiled by the D4’s great low light capabilities and dreaded how noisy the Fuji would probably be. But the Fuji did not let me down. Noise was negligible. I took many, many shots. Of course my editor will mainly be interested in the shots at the Porsche museum.

In neither the Porsche nor Mercedes museums did I need the compact Fuji EF-X20 fill flash. This flash has low power but is perfect as a fill flash. Beyond that, the flash has too little power to be of much use.

Mercedes-Benz Museum, Stuttgart, Germany

Mercedes-Benz Museum, Stuttgart, Germany

All in all, it was a successful trip. The Fuji did exactly what I wanted it to do and I wasn’t disappointed about not bring the Nikons. The Fuji has earned a place in my bag.